This document provides a detailed guide on how to configure an L2TP IPSec VPN Client connection on Windows operating systems. The L2TP (Layer 2 Tunneling Protocol) VPN Client with IPSec (Internet Protocol Security) is widely used to establish secure and encrypted connections over public networks, such as the internet, ensuring the confidentiality and integrity of transmitted data. This configuration is essential for users who need to securely access remote networks, whether for corporate purposes or to protect their online privacy.
The guide will cover the necessary steps to configure the built-in Windows VPN client, which is compatible with Windows 10 and Windows 11 versions. It will detail the prerequisites, system registry modifications (when applicable), creating the VPN connection, security and authentication settings, and the connection process. By the
end, you will have a clear understanding of how to successfully establish and use your L2TP/IPSec VPN connection.
Prerequisites
Before starting the configuration of your L2TP/IPSec VPN connection, make sure you have the following information and resources available:
- IP Address or VPN Server Name: The address of the VPN server you wish to connect to. This can be an IP address (e.g., 192.168.1.1) or a domain name (e.g., vpn.yourserver.com).
- Pre-shared Key (PSK): A secret key provided by your network administrator or VPN provider. This key is used for IPSec authentication and is crucial for establishing the secure connection.
- Username and Password: Valid login credentials for authentication on the VPN server. These are usually provided by your network administrator.
- Internet Connection: Your computer must have an active internet connection to reach the VPN server.
Before continuing, take the opportunity to check out our complete article “Configuring
L2TP IPSec on MikroTik with IP Cloud” to understand each step of the process in detail.
Configuring an L2TP IPSec VPN Connection on Windows
With the prerequisites in hand and, if necessary, the registry changes made, you can proceed with configuring the L2TP/IPSec VPN connection on Windows. The following steps are applicable to both Windows 10 and Windows 11.
Steps to Add an L2TP/IPSec VPN Connection in Windows:
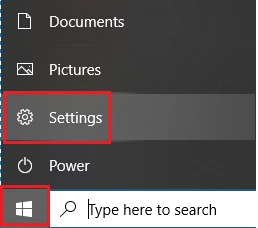
Open Settings: Click the Windows Start button and select Settings (the gear
icon).
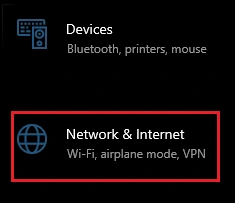
Access Network & Internet: In Settings, click Network & Internet.
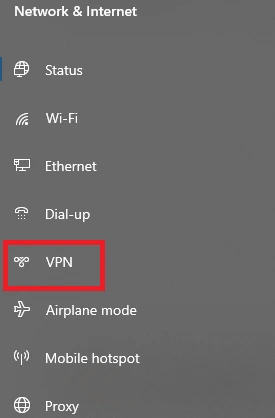
Select VPN: In the left-hand side menu, select VPN.
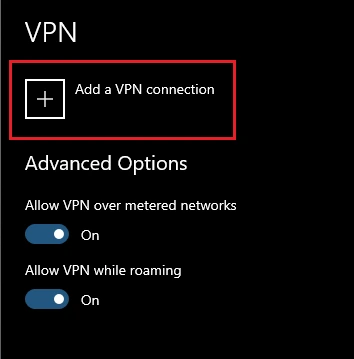
Add a VPN Connection: Click Add a VPN connection.
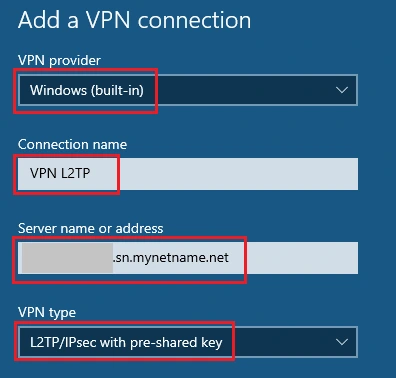
Configure Connection Details: Fill in the fields according to the instructions below:
- VPN provider: Select Windows (built-in).
- Connection name: Type a descriptive name for your VPN connection (e.g., My L2TP VPN).
- Server name or address: Enter the IP address or domain name of your VPN server (e.g., vpn.yourserver.mynetname.net or 192.168.1.1).
- VPN type: Select Layer 2 Tunneling Protocol with IPsec (L2TP/IPsec) with pre-shared key.
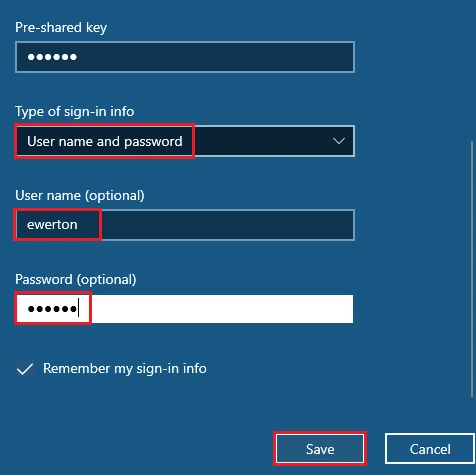
- Pre-shared key (PSK): Enter the pre-shared key provided by your network administrator or VPN provider.
- Type of sign-in info: Select User name and password.
- User name (optional): Enter your username for the VPN.
- Password (optional): Enter your password for the VPN.
- Check the box Remember my sign-in info if you want Windows to save your credentials.
Save: Click Save to create the VPN connection.
Steps to Connect to an L2TP IPSec VPN on Windows
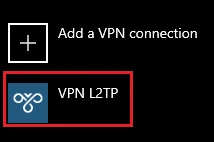
- Select the Connection: Locate the VPN connection you created and click on it.
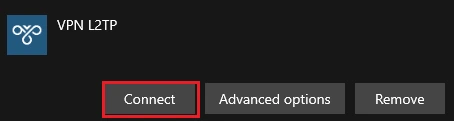
- Connect: Click the Connect button.
- Credentials (if prompted): If you did not check the Remember my sign-in info option during setup, you will be prompted to enter your username and password. Enter them and click OK
Once connected, the connection status will change to Connected.
Verifying Traffic Routing
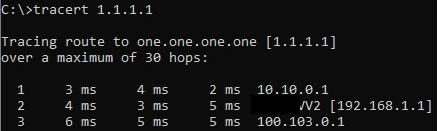
You can verify if traffic is actually passing through the VPN using CMD with the tracert command.
In the example figure, when executing tracert 1.1.1.1 , the first hop shows that the connection is being correctly routed to the configured L2TP/IPSec server.
Preventing All Traffic from Passing Through the L2TP IPSec VPN on Windows
If you do not want all traffic to be redirected to the L2TP/IPSec server, follow the steps below:
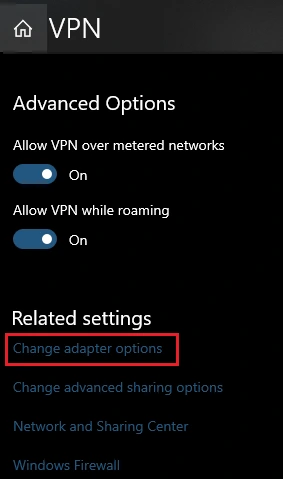
In VPN Settings, select the Change adapter options option.
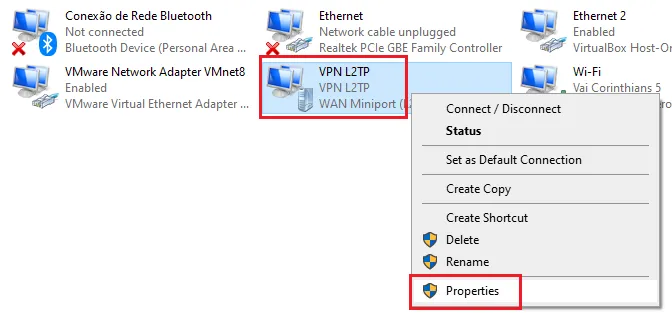
Locate the L2TP VPN adapter, right-click it, and choose Properties.
On the Networking tab, double-click Internet Protocol Version 4 (TCP/IPv4).
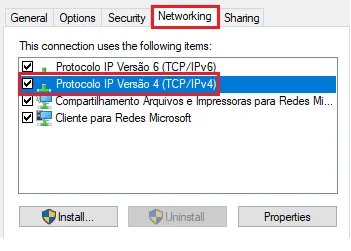
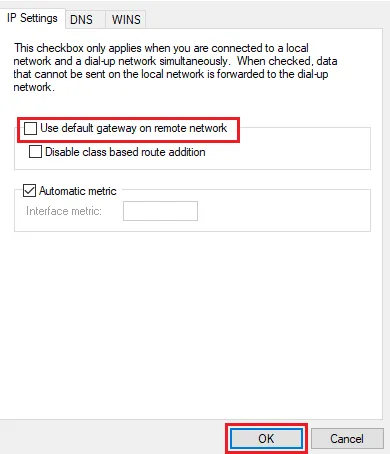
Click Advanced.
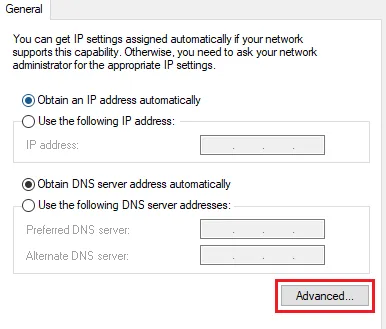
Uncheck the option Use default gateway on remote network.
Confirm by clicking OK in all windows.
Adding a Persistent Route in Windows
Adding a persistent route via Windows CMD ensures that certain network packets always follow a specific path, even after restarting the computer or server. Unlike temporary routes, which are lost upon restart, a persistent route remains active, providing:
- Routing stability
- Reliable access to remote networks
- Greater control over network traffic
Example command:

Thus, even after restarting the system, the route will remain active.
Conclusion
Configuring an L2TP/IPSec VPN client on Windows is a relatively simple process that can be completed by following the steps detailed in this guide. By establishing a VPN connection, you ensure that your data is transmitted securely and privately, protecting it against interception and unauthorized access. Remember that the key to a successful connection lies in having the correct VPN server information (address, PSK, username, and password) and, if necessary, performing the Windows registry modification to resolve NAT issues.
With your L2TP/IPSec VPN configured and connected, you can browse the internet with greater security, access remote network resources, and protect your online identity. In case of problems, carefully review the steps and verify that all provided information is correct. If difficulties persist, consult your network administrator or VPN provider for additional support.
Don’t miss any news! Click the link below and join our WhatsApp channel to receive articles, reviews, and exclusive news about Mikrotik firsthand.
👉 https://whatsapp.com/channel/0029Va4pJbu47Xe79TIBxo1G
Visit the EMNews blog and stay up-to-date with the latest news, analyses, and trends in the world of technology and telecommunications!